Thursday, December 29, 2011

Another beautiful sunny day with unseasonably warm temperatures for the midwest.  You won't hear me complain in the least.  I think I will take the Christmas tree down tomorrow so that I can start 'The Thornhill'.  Until that becomes the major 'story' in my blog, I thought I would introduce you to another of my interests and loves.

Many years ago, when we would visit my grandmother in the winter, she usually had a wool braided rug 'up and going'.  She related to me that when she and grandpa got their piece of homesteading land in northern Wisconsin, there was plenty to do outside in the summer.  But in the winter, after the animal 'chores' and the 'house duties', one had to find something to do to pass the time (and I assume to keep one's mind off the fact that one was living in a drafty and cold one room log cabin with two little girls).  Grandma, like many other homesteading housewifes, spent much of her time creating 'niceties' like braided rugs for their modest homes. .  Not only were they a great improvement over the 'feed sacks' that were nailed to the rough floor in the log cabin, but creating them made the time go faster, made a rough looking log cabin homey and warm, were a frugal way to extend the life of wool items that were no longer useable as clothing, etc. and were enjoyable to create.  Grandma' rugs were made of wool strips 2" wide.  She would save every scrap of wool from worn out garments, blankets, and sometimes wool that was given to her.  Then in the winter she would 'braid'.  The first winter she had enough wool for a rug approximately 4' across.  So, she would then tuck the raw braided end under the rug for the spring, summer and fall, and in the winter untuck the unfinished braid end and once again begin adding onto the rug.  After several winters, the wonderful hand braided rug became an incredible 13' across.  When they moved from the one room log cabin to a 'real stick built house' on the farm in northern Wisconsin, grandma's wonderful wool rug moved from the log cabin to the house.  It was STILL in use when I was a child.  Every winter before Christmas, the men would roll up the rug, carry it outside, unroll it in the snow and grandma would 'snow clean' the rug.  Then it was brought back into the house for the Holiday Season all fresh smelling and dust free until the next winter when the procedure would be repeated.

When my grandfather died, grandma moved in with our family and lived with us off and on until she passed away.  She taught me so very many skills, crafts, and needlework disciplines that are fast becoming obsolete and unheard of.   As a child, I 'helped' her cut wool for some throw rugs she made for us.  I still have the rugs, and they hardly show any wear.  They are over 60 years old and had much use.

Several years ago I decided I would like to keep the craft of hand braiding rugs alive by creating one myself.  A friend of mine and I began our journey into rug braiding.  We started by visiting 'Thrift Stores' within a 100 mile radius on the days when they had their 'quarter' sale days.  The result was a plethora of coats, jackets, skirts, and blankets of 100% wool.  All items were completely disassembled and all unuseable parts were discarded.  Then all  the pieces were washed in the washing machine using HOT water, and dried in the drier on HOT.  I then lightly pressed all the pieces with a steam iron to remove any wrinkles.  Then all pieces were cut in 2" strips and rolled into 'rug rolls'.


I then began my braided rug.  I did purchase a book from Amazon "The Braided Rug Book" by Norma M. and Elizabeth J. Sturges.  It was a VERY WISE purchase, and the instructions are just as my grandmother had done for years.  I am glad to have the book as a reference for all aspects of rug braiding. 
My rug is an oval rug, and began like this: 


It is progressing, and is now approximately 4' x 2-1/2'.  I saved all of the labels from all of the garments used in the rugs (even one "Harris Tweed" jacket from Scotland--hand woven wool).  When the rug is finished (hopefully this winter), I will have all of the labels, each with its own swatch of fabric from 'whence it came' attached.    Then I will mount them on matt board with a small provenance statement and keep it with the rug for posterity.


After braiding, the rug is 'laced' (NOT SEWN) together with linen cord.  The lacing allows the rug to be reversible and hence extends the wear of the rug.  The braid itself is approximately 1-1/4" and is about 5/8" thick.  That means there is 5/8" of warm, solid wool under your bare feet.  Not many carpets can compare with that durability and warmth.  I need to get back to braiding.  That will all come in good time, but first I must get 'The Thornhill' built.  I will probably do some braided rugs for the doll house too.  Except that they will be braided with fine wool yarn and not wool fabric to meet the 1:12 scale of the house.
That is my entry for today.  Hope it sparked some interest in someone in the traditional and increasingly 'lost art' of rug braiding.

Dottye


Tuesday, December 27, 2011

Christmas has come and gone for another year, and I must say it is relief to have it all behind me.  I look forward to the new year and completing some projects I have already started, and anticipate my venture into once again building dollhouses.  All of the dollhouses I have built in the past have been either given away to deserving little girls, or sold (mostly the former). 

When I was an 8 year old child, my father built me a dollhouse for Christmas.  During those early years, our family pretty much lived from month to month.  With three growing children to take care of and support, there was little money left each month for frivolity.  However, those were the 'good old days' and fruit and produce came to the grocery stores in 'orange crates' which were wooden half boxes with solid wooden ends and sides and bottoms of wooden slats.  Usually the ends contained a colorful printed label denoting the contents of the crate.  They were usually discarded by the grocer.  This particular Christmas, of 1949, my father saved and salvaged numerous orange crates from the the local stores and constructed a dollhouse for me for Christmas.  It was HUGE.  It probably measured 40+ inches across, was approximately 30" deep, and from the floor to the roof apex was approximately 28".  It was so sturdily constructed that I could sit on the top and dangle my legs down the open back with no fear of damage.  The floors were all 'carpeted' with wool remnants from my mother's sewing scraps.

  The arched 'doorways' were lovely, and the 'arch pieces'' that were removed from the hole cut for the doorways were used as headboards and footboards for two beds he built to grace the bedrooms.  Here are recent photos of those much cherished beds.  You will note that as an 8 year old, my idea of decorating furniture was a 'doggie' sticker on the end of each bed.


.  How I loved that house.  When I was 13, we relocated to California.  The dollhouse's size made it impossible to fit in the available space for moving on the truck.  So it was given to a little girl whose father was the pastor of the church we attended.  I have often wondered if she still has it, or if it became 'kindling' for the fireplace.  I can still see it in my mind's eye.  It was painted bright yellow with a hunter green painted roof and outside trim--garish colors, but beautiful to me!!

Here are a few photos of some of my past houses:


I am anxious to 'jump in' to my next venture in miniatures and build the Thornhill.  It will be a big project, but will be fun and rewarding to complete.  Although, one never truly 'finishes' a dollhouse.  There are always little 'tweeks' here and there that keep ones interest.  If you are interested in seeing what the "Thornhill" looks like, here is a link from the manufacturer. 


So, I have my work cut out for me.

Dottye

Sunday, December 25, 2011

Merry Christmas, 2011.  Had a wonderful meal (have to say so, even though I prepared it), cleaned up the kitchen, and am now ready to settle down and read and watch the football game later this afternoon.  Have to organize all of my 'tools of the trade' for the building of the 'Thornhill Federal Mansion' that I plan to embark on January 2nd.  Having sold or given away all of the previous dollhouses/miniature homes I have built over the years, along with some of the less desireable pieces of furniture that I knew would NEVER be a part of the Thornhill, I now must go through all of the rest of my miniature collection that I have amassed over many decades.  I love to 'visit' the Colleen Moore Fairy Castle online.  Living only 3 hours from Chicago, I have seen the original 'Castle' which resides in the wonderful Museum of Science and Industry in the 'windy city'.  Oh to have the resources to create a castle such as hers.  But it is always fun to dream.  If you are interested in perusing the Colleen Moore's life-long love and creation, you can, by opening this wonderful link:  http://www.msichicago.org/whats-here/exhibits/fairycastle/

Once you open the above link, you will be faced with the first of two 'pages'.  When you access 'page 2' there will be a click link at the bottom that says 'Tour'.  If you decide to 'tour', you will be treated to a wonderful excursion into Colleen Moore's world of miniatures !!!!  It is marvelous, and certainly a lovely way to spend a portion of Christmas, 2011.  Have a wonderful 'tour'.

Dottye

Saturday, December 24, 2011

Christmas Eve already


Good grief, Christmas Eve is here already, and for once, I'm ready.  We have a lovely Christmas tree this year.  For years my husband, who is a wonderful musician, was on the road over Christmas and New Years.  So I never bothered to put up a tree for myself and the dogs.  Then when he got off the road, we usually spent Christmas at my parents lovely old Victorian home in Southern Illinois.  After both of my parents passed, I just didn't 'feel very Christmasy' so the tree and all of its wonderful trimmings sat in the basement.  This year I decided it was time to once again put up a Christmas tree.


As you can see, it conveys the 'feeling' of Christmas quite nicely.  It is trimmed with ornaments from years past.  The blown glass birds I inherited from my dear mother.  How she loved birds.  She painted them, fed them, became intimate with the hummingbird family that frequented her arbor in the summer time, and chased the squirrels away from the feeder in the winter so her 'beautiful cardinals' could have the suet and seeds she religiously put out for 'God's feathered creatures"..  The Victorian fans are some of my creations from 20 years ago.  They were made from folded ribbon and are still quite lovely.

I promised to post my latest Christmas Original today.  Several years ago, I created a line of clothing of my own design for children.  It is called "D'Vine D'Signs' by dottye  "Heavenly Couture for Children".  I love to design and sew for children.  The idea was to design and construct wonderful children's clothing that was sewn with couture and heirloom techniques, in lovely fabrics and trims.  The Christmas Ensemble below was created for a very special little girl.  Her grandmother is my best friend.  Little Isabella ('Bizzy Izzy' as she is fondly referred to), is one of the most charming 3-1/2 year olds I have ever known.  I must admit, and quite happily I might add, she is a 'drama queen' of incredible proportions.  Her life thus far has included being entertained by old Shirley Temple movies and the like.  Consequently, she dances and acts as if she were the latest little actress from MGM.  And act she does!!!!  She has the demeanor of Shirley Temple, but the original personality of  our 'Bizzy Izzy'.  It would be difficult to find a more charming child!! 


"Bizzy Izzy and Santa" 2011
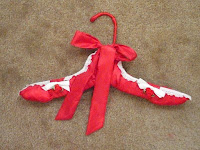
  Now back to the actual Christmas Ensemble shown above.  It includes a Victorian dress with lined velveteen bodice and taffeta skirt with organza/tulle underskirt; a 'Fantasy Fur' party jacket, a faux silver fox hat and matching muff, and the "pièce de résistance"-- a custom designed garment bag with coordinating padded satin hangar.  It was a joy to design and construct such a beautiful Christmas ensemble for such a lovely little girl.

Our weather in Iowa has been unseasonably 'warm' for this time of year.  The sun is shining brightly this Christmas Eve morning, and the sky is cloudless and a lovely shade of blue.  Even the weather seems to be cooperating in the 'Spirit of Christmas'.  So, now that Christmas is appropriately on my new 'blog', I will wish you all a very Merry Christmas.

 Dottye


Friday, December 23, 2011

To give credit where credit is due

Yesterday I posted a photo of a quilt "How Sweet It Is" and at the time did not have the designer's name handy.  Her name is Deborah Hobbs, and the design appeared in the Mar/April 2010 issue of McCall's Quilting Magazine.  Her design was for a 45' x 45" quilt, however, I added and extra row or two of blocks to increase the size to a Child's size quilt, over as some say, an oversize crib quilt.


While I'm in the mood today, here are a few more porcelain pieces.  First a soap dish that I painted over 20 years ago.  It has graced our bathroom since it was painted.  I love painting roses, and especially 'baby roses'.


Here's another of my favorite pieces.  It is a 12" Hutchenreuther embossed bowl, painted with lovely pink roses and hydrangeas.  The original mold for this blank was one you may have seen painted by RSGermany artists.  It is a lovely blank.  The second photo shows the soft detail work.


I have always painted oils and watercolors, and have done some charcoals and pen and ink.  However, in the 1970's my wonderfully talented and creative mother began taking classes in porcelain painting.  She told me she would pay for my lessons, if I was able to find a teacher in my area.  At the time, she lived in California, and I reside in Iowa.  Incredibly, one of the finest porcelain artists in the United States lived in my town of Dubuque, IA.  I contacted her, and began to take classes every Monday night.  Painting on porcelain is NOT for the 'faint of heart artist'.  It is a very difficult medium to master.  All the paints are powdered and mineral based.  For instance, the purple and pink colors contain gold as their mineral base.  Hence they are very expensive.  The medium used to mix the paints and make them 'paintable' is oil.  The paint powders are ground with the oil and applied to the porcelain.  The paints are translucent, and consequently, many fires are necessary on each piece to bring out the colors to the level needed for beauty and artistic value. 

Because there is no such thing as 'white' porcelain paint (there is white enamel), the art of porcelain is much like watercolor, in that once you paint 'over' the background of white porcelain, that white 'highlight' area is gone forever.  Consequently, one must 'wipe out the highlights as one paints to obtain the realistic qualities necessary for a lovely work of art.  One of the most difficult things to paint is a 'white rose'.  The reason it is so difficult is that you do not "paint" a white rose.  Rather, you paint the background AROUND the shape of the rose so the blank white porcelain magically 'appears' as a white rose.  Here is one of my white rose pierced plates I painted 15 years ago.  It is a lovely example of the 'Victorian method' of porcelain art and presentation.  Most people believe it is an antique.


This is a detail that shows where I signed the piece.  you can look at the photo below and see that area within the entire design.

Well, it is December 23rd, and I should be doing 'all things Christmas'.  However, I am sort of a 'curmudgeon' when it comes to Christmas.  Most of the commercialization  and greed surrounding this holiday produce a 'bah humbug' from me.  However, it is a good time of the year to remember the pleasant things throughout the year and the good things that happened to us and those we care about.  I began this blog initially for the purpose of documenting some of my creative 'ventures', and most specifically the building and progress of an IMMENSE dollhouse to house my miniature collection.  It is a 1:12 scale 14 room Federal style home.  It is 4' wide and 28" deep and over 30" tall.  I can't wait to build it, get it electrified, decorated, and furnished.  As soon as the Christmas tree comes down, the building begins.  So, you can imagine I am waiting with bated breath for Christmas to come and go.

Perhaps tomorrow, Christmas Eve, I will post some of my lovely "D'Vine D'Signs" by dottye (Heavenly couture for children).  The latest ensemble has Christmas written all over it.

Later,

Dottye


Thursday, December 22, 2011

The blog begins

     I have always wanted to have my own blog where I could post my musings about the ideas and inspirations that permeate my very being.   My artistic personality and creative mind take me on a daily journey from insanity to wonderment.  The results of most of my ideas and inspirations never cease to amaze me.  Not because they are particularly great, but because once these ideas and inspirations become reality for me, and embody color, texture, space, and movement,  it is always amazing to step back and view the results, knowing that my 'insane ideas while lying in bed trying to count sheep, could actually become reality.

     I am an artist who dabbles in many mediums.  My favorite painting mediums are watercolor and porcelain.  To my eye, there is nothing quite so lovely as a beautiful French or German porcelain blank, painted to perfection with subtle colors and shadings that create florals so delicately realistic.  The 14" vase below is painted with hydrangeas.and edged in 24K gold.  All my porcelain is fired in a large kiln in my basement. 


One would think perfecting painting on porcelain would be sufficient for one person.  But, that's what separates me from the average person.  Here is where the insanity comes in.  Painting with a brush is satisfying, but painting with fabric and and texture is also part of my insanity.  The quilt below is my own design.  I call it 'Charming Spools'.  There are no two center squares alike.  Hence it is a 'charm quilt'.  The quilt is double bed size, and is hand quilted. 


I have quilted numerous quilts over my lifetime of 71 years, and continue to have a fabric
'stash' that could choke a horse, and quilt tops waiting to be quilted.  Since the advent of the 'long arm quilting machines', I have given in to having several of my tops quilted by machine.  They are lovely, but there is nothing to compare to a handquilted quilt.  Below is a machine quilted top that turned out to be exquisite.  It is a child's quilt, designed by a woman named Deborah ??? I will publish her name and credits in a future blog.  I found the pattern in a McCall's quilting magazine, and I believe it was called "How Sweet It Is".  The quilt is pieced, but has a 3 dimensional effect with the 'candy wrapper' ends that are actually 'free' from the seams of the quilt itself. I hand tacked them down so they would not flop in the wind, so to speak, then added the ribbon ties. It is one of my favorite quilts, and the machine quilting is wonderful.


So that is the beginning of my journey into the bloggosphere, allowing you to enter into my world of "Insanity to Wonderment". 

Until the next time,

Dottye